Build a custom bike rack for under $20.
Supplies needed
- Three 8′ 2×4’s (depending on how many bikes you have, wheel size and how far apart you want the bikes spaced you may need more, or less 2×4’s)
- Saw (hand or powered)
- Drill and screws (or nail gun)
- Tape measure
- Pencil
- Ratcheting clamp *optional
- Speed square *optional
- Cinder bocks or pavers *optional
- Paint / paint brush *optional
Steps
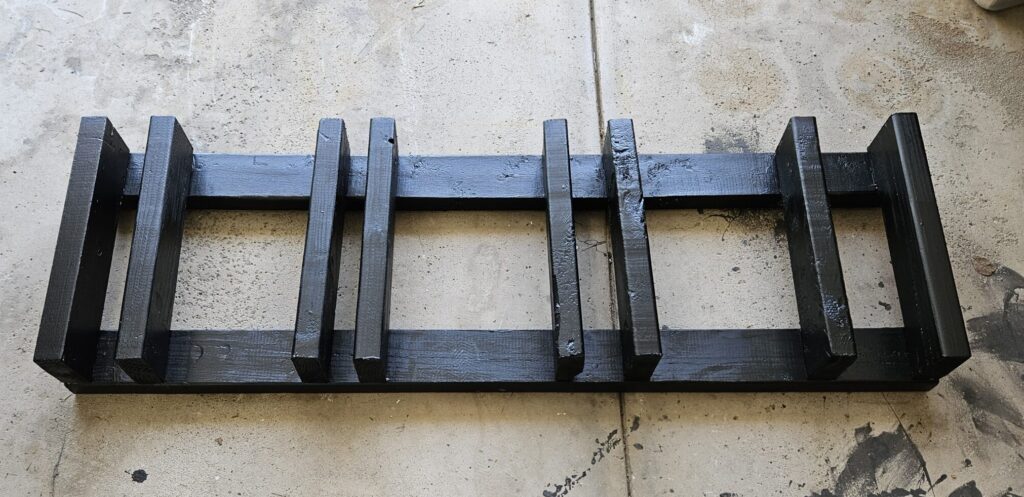
- Lay two of the 2x4s flat on the ground parallel to each other and spaced 16″ apart. We can call these the base pieces.
- Cut the other 2×4 into six 16″ boards. We can call these the support pieces.
- Attach one of the support pieces to the base pieces so that they are connected on one end.
- Put a bike on the rack so the tire is up against the first support piece. Hold the bike in place and put another support piece firmly up against the other side of the tire. Draw a line on each base piece where the 2nd support piece sits.
- Remove the bike and attach the support piece. Once it’s attached put the bike back on the rack and make sure the tire fits snuggly in the slot. The bike should be able to stand upright on it’s own without much wobble or lean.
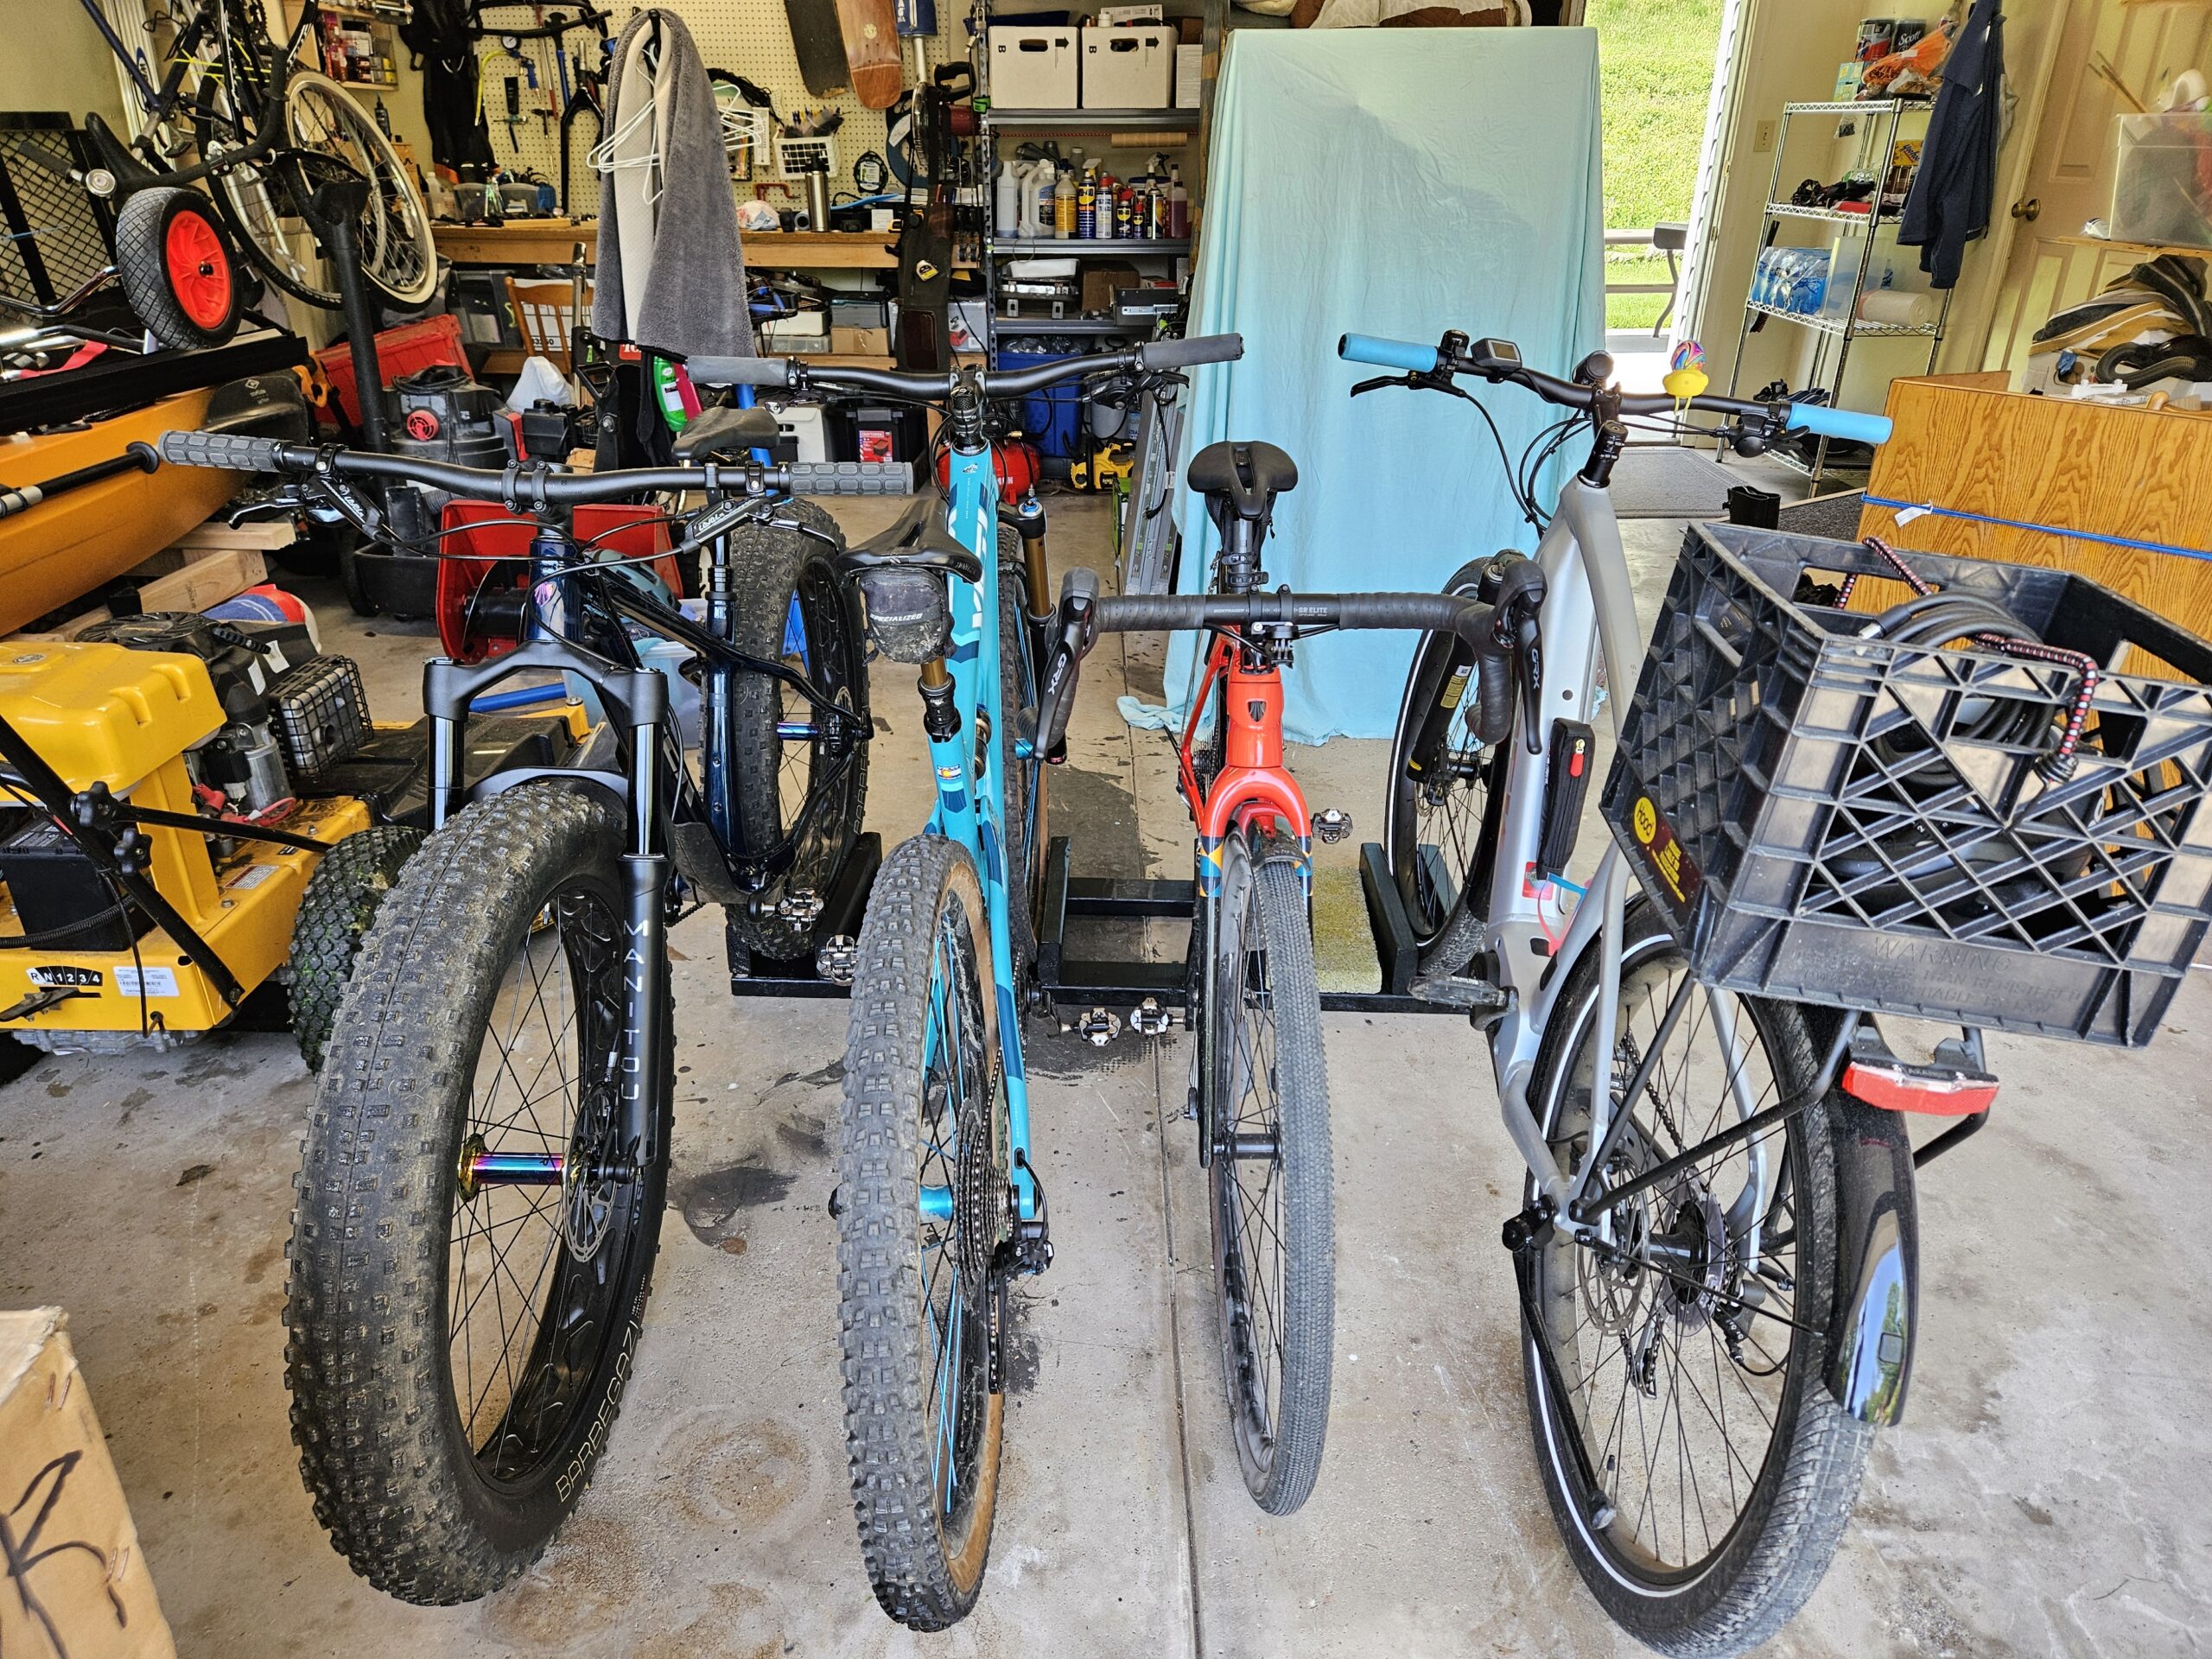
- With your first bike on the rack get the next bike and see how it will fit best next to it. You can have them all facing the same direction or stagger them front to back to fit more.
- When you found where the 2nd bike will go put a support piece on each side of the tire and mark lines on each base piece. Remove the bike and attach the support pieces. Verify the 2nd bike tire fits snuggly in the rack.
- Repeat the steps you did for the 2nd bike for the remaining bikes.

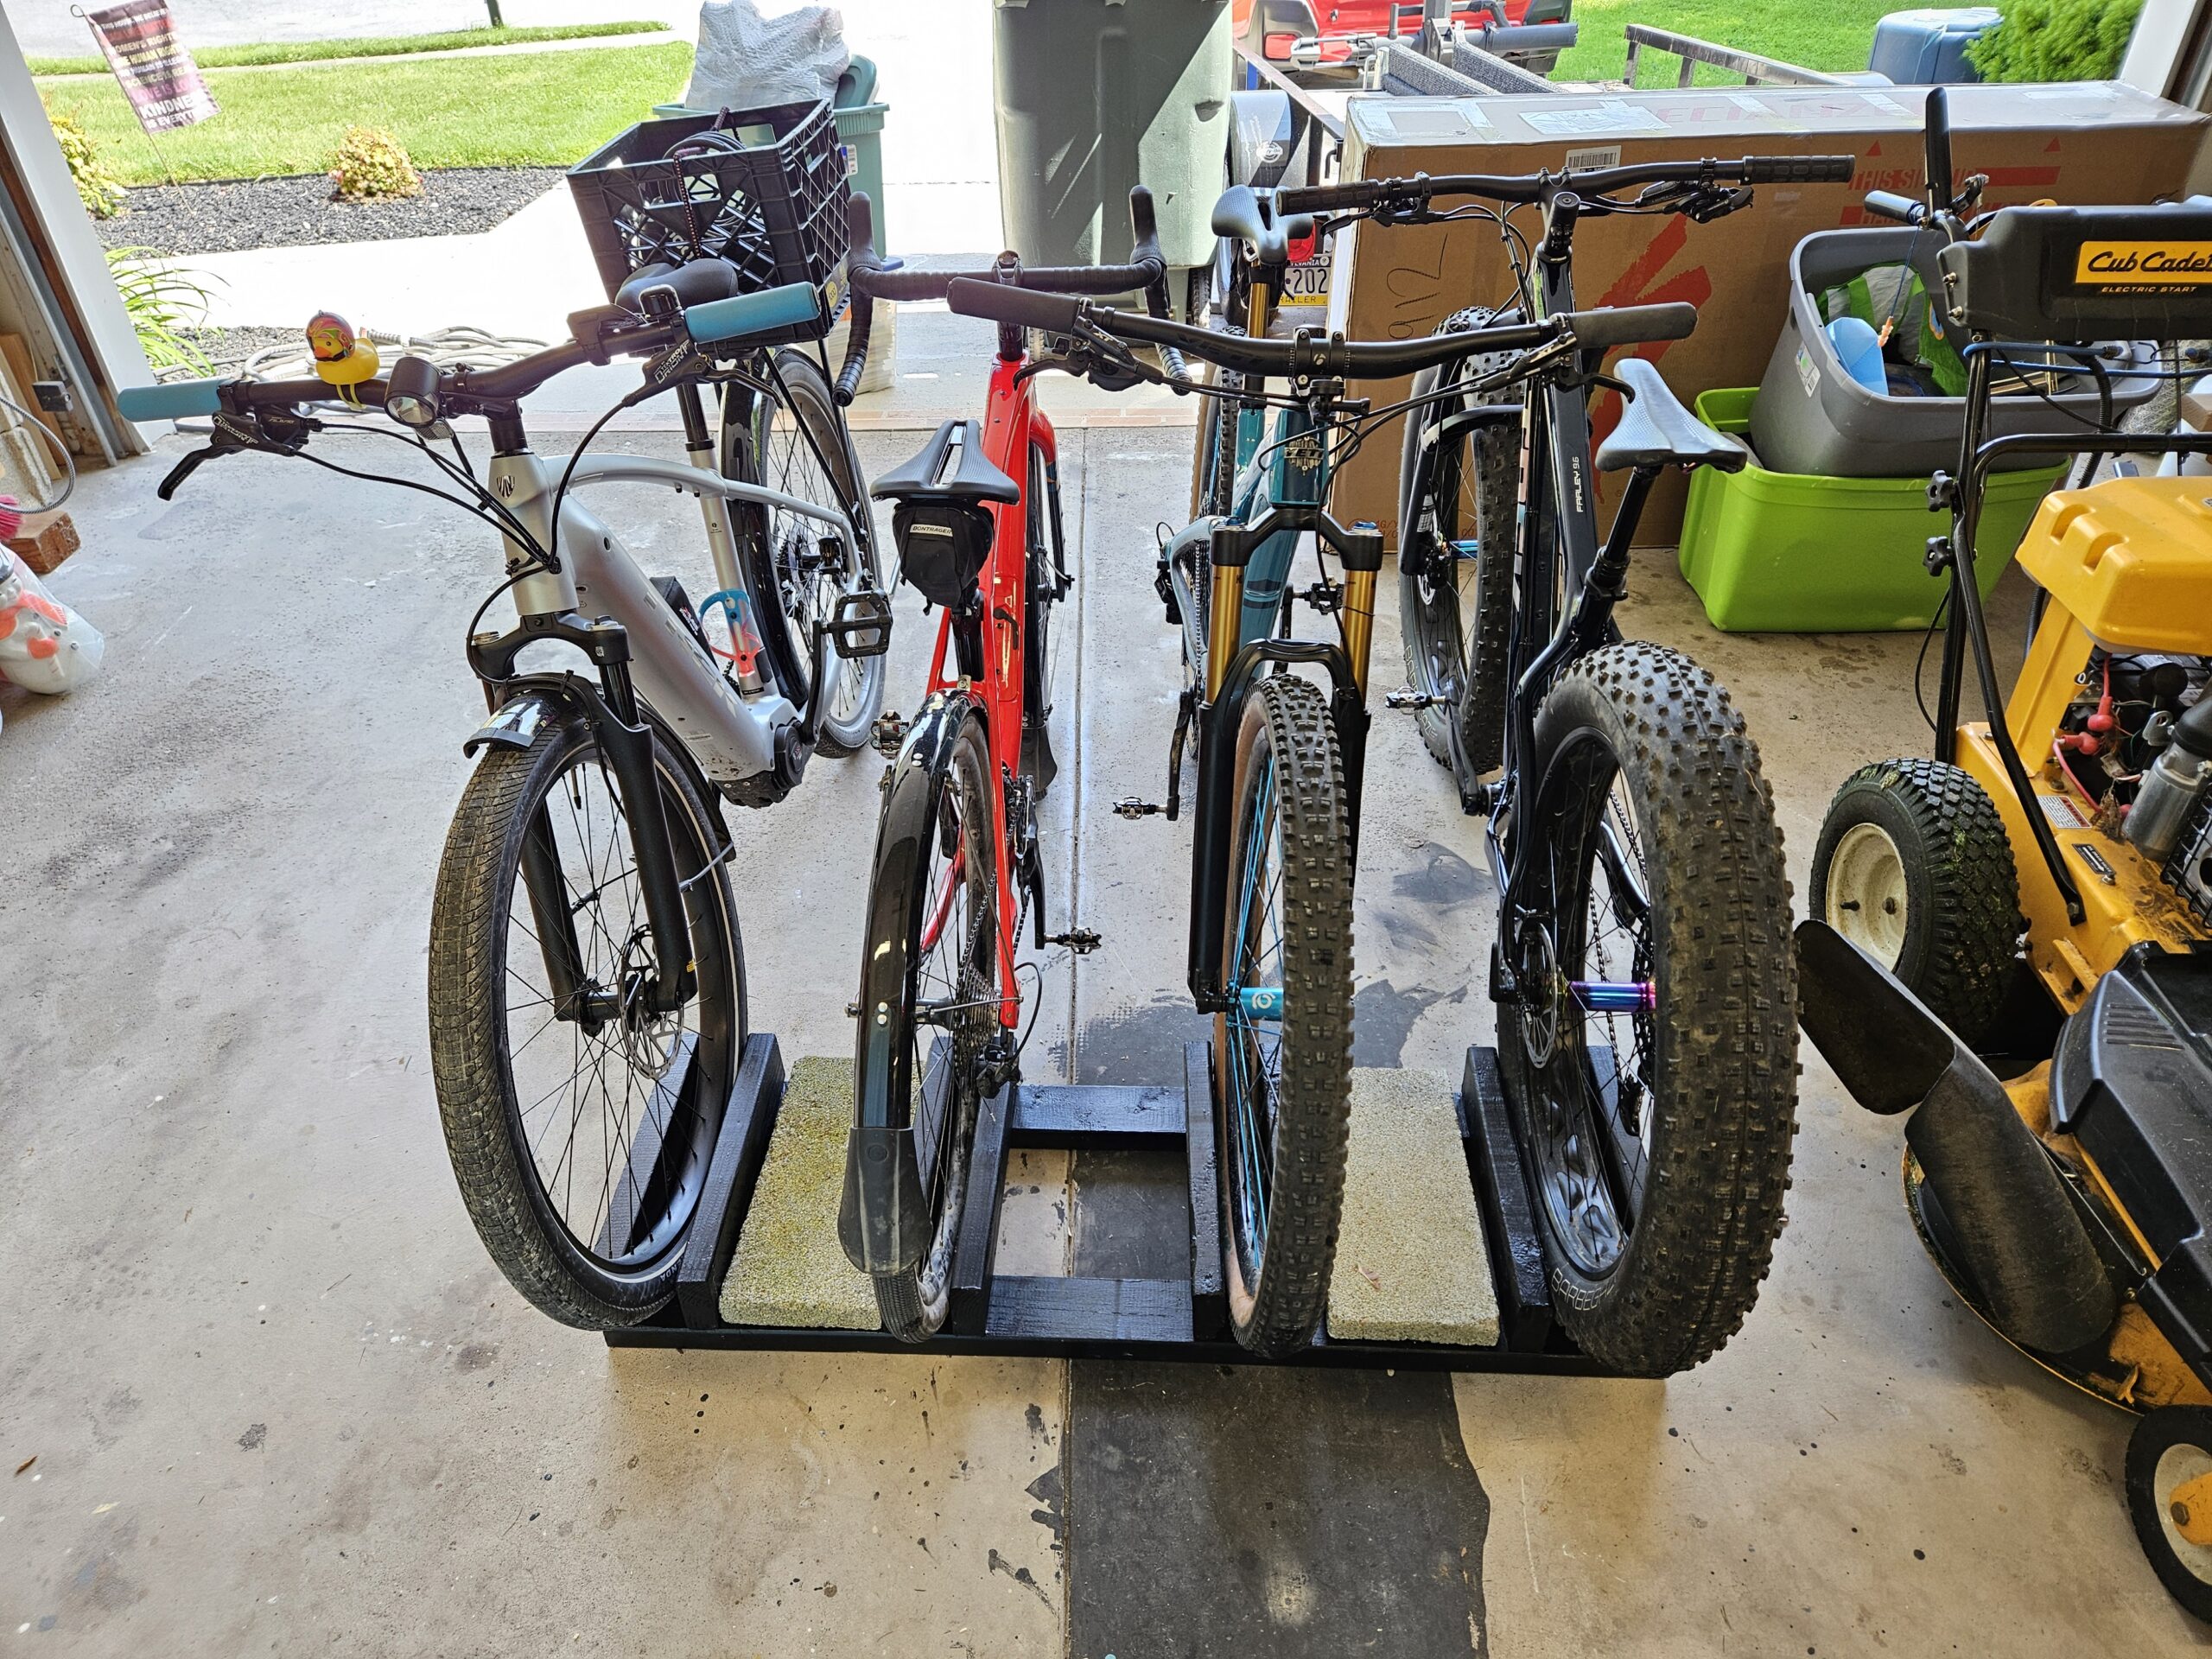
This is what my 4 bike rack looks like. I placed some pavers between the slots to add some weight to the rack so it wouldn’t move around when putting bikes in or out.